
Hello Lovelies , here we go at last with my hexagon tutorial, thank you for being so patient:0)
Firstly I want to make it clear this is not my own pattern but a free online pattern originally published by Coats and Clark HERE .Click link on this page for PDF.
I want to thank the lovely people over at C&C for giving me permission to do this tutorial.
I have possibly gone a little overboard with the photos but I wanted this to be as clear as possible for you lovelies.
As usual I'm using U.S. terms
So lets get started ........
To begin with chain 4....

Slip stitch into first chain to form ring....

Round 1 (this round is made up of 6 cluster stitches) First cluster is made like this....Chain 3 ....

Yarn over hook , insert hook into ring,yarn over and pull up loop (3 loops on hook).....

Yarn over and pull through 2 loops ( 2 loops on hook ).....

Yarn over , insert hook into ring, yarn over and pull up a loop ( 4 loops on hook)....

Yarn over and pull through 2 loops (3 loops on hook)

Yarn over and pull through all 3 loops . First cluster made.....

Chain 3.....

Begin second and subsequent clusters like this .....Yarn over, insert hook into ring, yarn over,pull up a loop( 3 loops on hook)....

Yarn over and pull through 2 loops (2 loops on hook).....

Yarn over and Insert hook into ring for second time, yarn over and pull up loop ( 4 loops on hook ).....

Yarn over and pull through 2 loops ( 3 loops on hook ).....

Yarn over and Insert hook into ring for a third time, yarn over and pull up a loop ( 5 loops on hook ).....

yarn over and pull through 2 loops ( 4 loops on hook ).....

Yarn over and pull through all 4 loops . Second cluster made. chain 3....

Make 4 further clusters in the same way as the second cluster,with chain 3 between each (6 clusters made).....

insert hook into top of first cluster and slip stitch to finish off.....

Round 2...Attach a new colour into the top of any cluster using a slip stitch.....

I've used my scissors to indicate the stitch I'm attaching through...it's sort of to the left hand side of the cluster...

Chain 1 and single crochet in same stitch........

Next make 5 double crochet (D.C.) in the next 3 chain space .......

S.C. in top of next cluster.......

Repeat around .You will have 6 lots of 5 D.C.(here I've got one lot left to make ) slip stitch to first single crochet and finish off..........

Round 3......Attach new colour into 3rd D.C. of any 5 D.C. group..........

Chain 1 and S.C. in same stitch..........

Skip next 2 stitches and into the top of S.C. from round 2 make an open shell stitch like this ....
3 D.C......

Chain 2......

3 D.C.........

Skip the next 2 stitches of round 2 and S.C. in 3rd D.C.........
Continue around, again skipping 2 stitches then making an open shell into the S.C. of round 2.....

Once 6 shells have been made slip stitch into first S.C. and finish off......
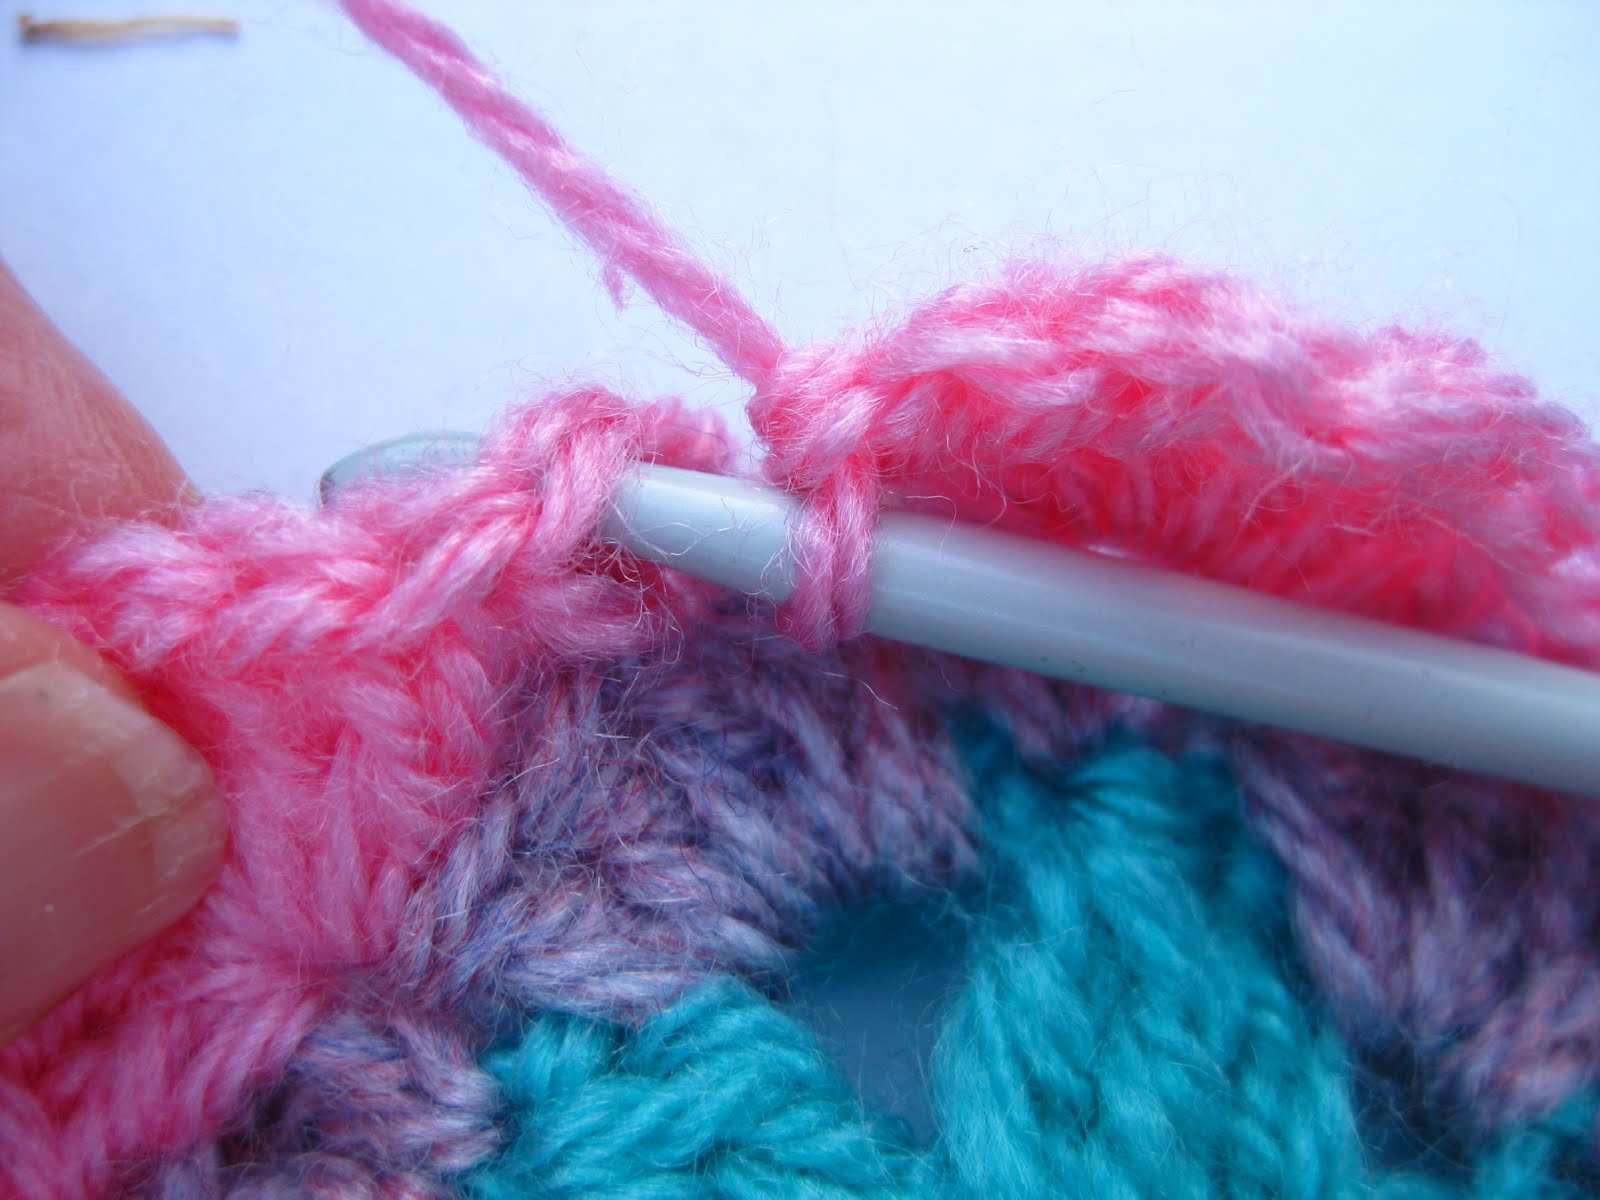
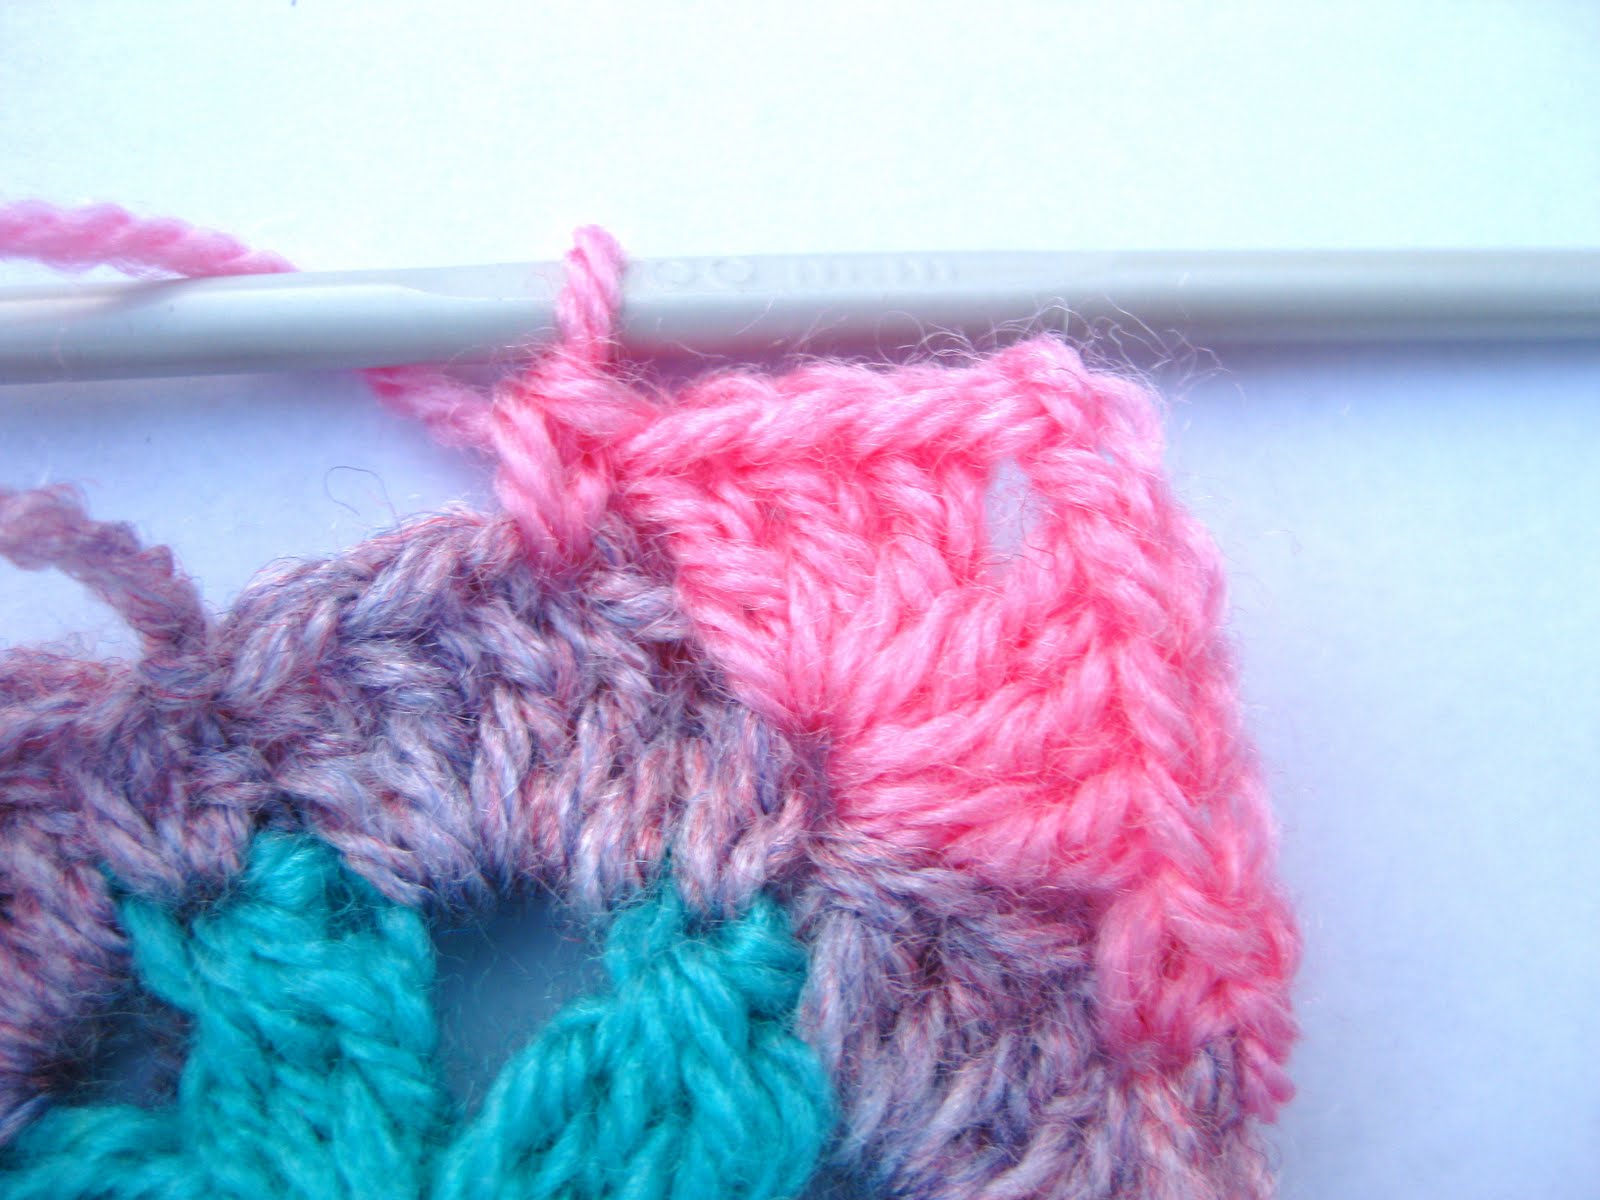
Round 4....... Attach a new colour into any 2 chain space of open shell ,chain 1 and S.C. in same space.....

Chain 1 and make 3 D.C. into next S.C. of round 3.........

Chain 2 and make 3 D.C. into same space ( open shell made )........

Chain 1 and then S.C. into next 2 chain space ....

Continue around , remembering to chain 1 before and after each open cluster.........
Slip stitch into first S.C. of round 4 and finish off.....

You have now made a sweet hexagon. Isn't it pretty :0)

At this stage you could carry on with round 5 as it is described in the original pattern HERE .
I decided to change the final round for my Kaleidoscope blanket and
In PART TWO I will show you this round and the method I devised to join these beauties as you go ....

I'll leave you with a close up of the posy of Daisies picked for me by my eldest whilst I slaved over this.Bless him :0)

I hope this tutorial is clear and I haven't made any mistakes . If you encounter any problems please let me know .
Jacquie x
Hmmmmm, can't wait to try this tonight while watching TV. I'm loving the fabulous colors you used in your sample here! The finished product looks so fun! Thanks for bringing this C&C tutorial to us! Beautifully done! x&o, Annette
ReplyDeleteSo pretty!!
ReplyDeleteThank you Jacquie! Your tutorial is very clear!
ReplyDeleteI should really try these :):)
Have a beautiful Tuesday!
Angie
Thank you. Very beautiful !
ReplyDeleteOh, thank you so much! I can't wait to start a blanket like this, but have to finish the other two first... Thank you Jacquie for making this clear tutorial, with the original pattern alone I did not manage.
ReplyDeleteHave a lovely day,
Maaike
This is a really lovely hexagon! Thanks for making it so clear x
ReplyDeleteoohhh wow thank you for sharing this i am going to sit down tonight when the house is quiet come up to my little cupboard where my computer is and have a go at this ;-)) dee x
ReplyDeleteImagine a blanket made with these gorgeous hexagons. I like yours by the way, such pretty colours and thanks for the tutorial, the pictures are a great help :-)
ReplyDeleteLovely clear tutorial, might give it a try. What a fabulous shot of the daisies, so crisp and clear :)
ReplyDeleteOOooh thank you so much. I have been waiting with baited breath for this and what an excellent tutorial. Fantastic. Hexies... here I come! x
ReplyDeleteThanks for sharing! A very good and helpful tutorial!
ReplyDeleteYour tutorials are always so clear and easy with all the photos - must take you forever to post, thank you. Love the top photo with the hexagons and daisies :)
ReplyDeleteJones x
Fabulous tutorial, thank you so much xx
ReplyDeleteWow! What a fantastic tutorial! I learned how to do the ripple pattern from Lucy at Attic 24, but I think I will finally master little motifs thanks to you!! :)
ReplyDeleteJust to let you know I have made one and it worked perfectly! x
ReplyDeleteThank you very much for this Step by Step Instruction. I made a link in my German Blog. I hope it´s ok for you.
ReplyDeletehttp://wollerausch.wordpress.com
Greetings from Germany
Madame Flamusse
Thank you Jackie.
ReplyDeleteCute hexagon, need to add these to my list of 'would like to have a go at...'! Lovely clear tutorial x
ReplyDeleteThese hexacons are really beautiful - thank you for sharing the tutorial! They make so nice figure like caleidoscope. Last photo with daisies is amazing!
ReplyDeleteHave a lovely time!
When I saw this crochet hexagon, I suddenly felt very excited, it's gorgeous! I've not seen one like this before, and I love it! Your tutorial is fab, really clear, and I'll enjoy following it, thank you. I've followed the link from Madame Flamusse who showed your hex on her blog, I immediately followed the link, and found your lovely and inspiring blog! Vanessa xxx
ReplyDeleteAwesome! I seriously need to crack on with some hexagons are these are gorgeous. Thanks Jacquie x
ReplyDeleteThats a really nice pattern for a hexagon - Ive just been visiting crochet blogs as I have not done any for what seems like an age! Your tutorial has inspired me, even if I only make a coaster (ie - one) then I shall give it a whirl!
ReplyDeleteSending love
Julia x
Hi,
ReplyDeleteI just found your blog a few days back and I really fell in love with it. Your tutorial is amazing! I will have to have a go at it. :)
Your newest follower.
xx
Lovely Jacquie,cant wait to give it a go! thankyou,juliexx
ReplyDeleteOh Thank you so much for the how to,I had forgotten how.stoke and all.Love your blog.
ReplyDeleteThanks for the flower names! "Alium"...I've heard of it, but just don't think I've ever seen it! I want some of that in my yard, but it probably wouldn't grow here! I used to live on the West Coast of the U.S. and moved to the East Coast (2600 miles) a few years ago. It's such a different world of plants here! Our winters are cold and the summers are hot and very humid. The bugs seem to thrive, but "not so much" for the blossoms! I had roses my first year here and a beetle (like I've never seen before) swooped in after the first round of blossoms and systematically ate all buds and leaves. I've given up on roses...the beetles are brutal! Have a great week. I'm still thinking about that cute bunny you just posted!
ReplyDeletenice!
ReplyDeletethanks!
from Chile
c@
I've never been able to figure out granny squares. your pictures and instructions were excellent. than you.
ReplyDeleteHello !!! i'm from Argentina, I love the way you explain = ) lovely grannys
ReplyDeletei love your tutorials for the great use of photos! I was just trying a hexagon without photos and I know I was doing something wrong. I pop over here and scroll as I go and I get it right! thanks!!
ReplyDeleteGreat Tutorial!! Thank you, I'm teaching myself to crochet and your instructions made perfect sense to me.
ReplyDeleteHello and thank you, Karin
ReplyDeletethanks for sharing... great blog
ReplyDeletethank u zoo much for making it so eay for us ,just finished making it in no time at all.thanks again
ReplyDeleteThanks so much for taking all the pics and detailing it out, I have learned so much from your tutorials....Thanks again for sharing this with the world!!
ReplyDeleteThanks for such clear and organized tutorials. You make this stuff so easy!
ReplyDeleteMay I ask for needle number? thank you, great job! From Argentina :)
ReplyDeleteHi, thanks for your comment. I used a 4mm hook
ReplyDeleteJacquie x
Hi, thanks so much for your wonderful tutorials. It has made it so easy to learn how to make these gorgeous hexagons. I have been challenging myself and have made a few of your different squares but am totally addicted to the hexagons. I am also left handed but that didn't matter with your step by step instructions. Thank you so much :)
ReplyDeleteHi, not sure if you will see this message but i am trying to access the original pattern for the hexagon blanket... the link on your blog doesn't work- nothing on the site. Do you have the PDF pattern you could post? Or post the pattern? I would be very grateful if you would! Thank you!!!
ReplyDeleteHi, thanks for letting me know about this . I found this link via Ravelry....hope it helps.
Deletehttp://web.archive.org/web/20130105170218/http://www.coatsandclark.com/Crafts/Crochet/Projects/AfghansThrows/KCT0001+Graphic+Granny+Afghan.htm
Jacquie x
Thank you for the tutorial, Jacquie! Very descriptive pictures, I got it quite right despite being new to crocheting terminology.
ReplyDelete