Hello Lovelies,
Yay, finally I've managed to get this tutorial written up for you kind people. It does seem to have taken me ages but that's only because I wanted to include lots of detailed words and pictures. It really is a super easy project which grows ever so quickly due to the chunky yarn.
They are simply a rectangle of crochet and then joined at the side seams to form a tube....leaving a hole for your thumb ( or not if you prefer your wrist warmers without a thumb-hole )
Remember a few weeks ago I made these in teal with sweet Granny Flowers............and wrote about them HERE

Unfortunately they ended up a bit large...bother.
But because it is such an easy, speedy project I was happy to try again with a slightly smaller starting chain and a new yarn colour.....a gorgeous blue this time.
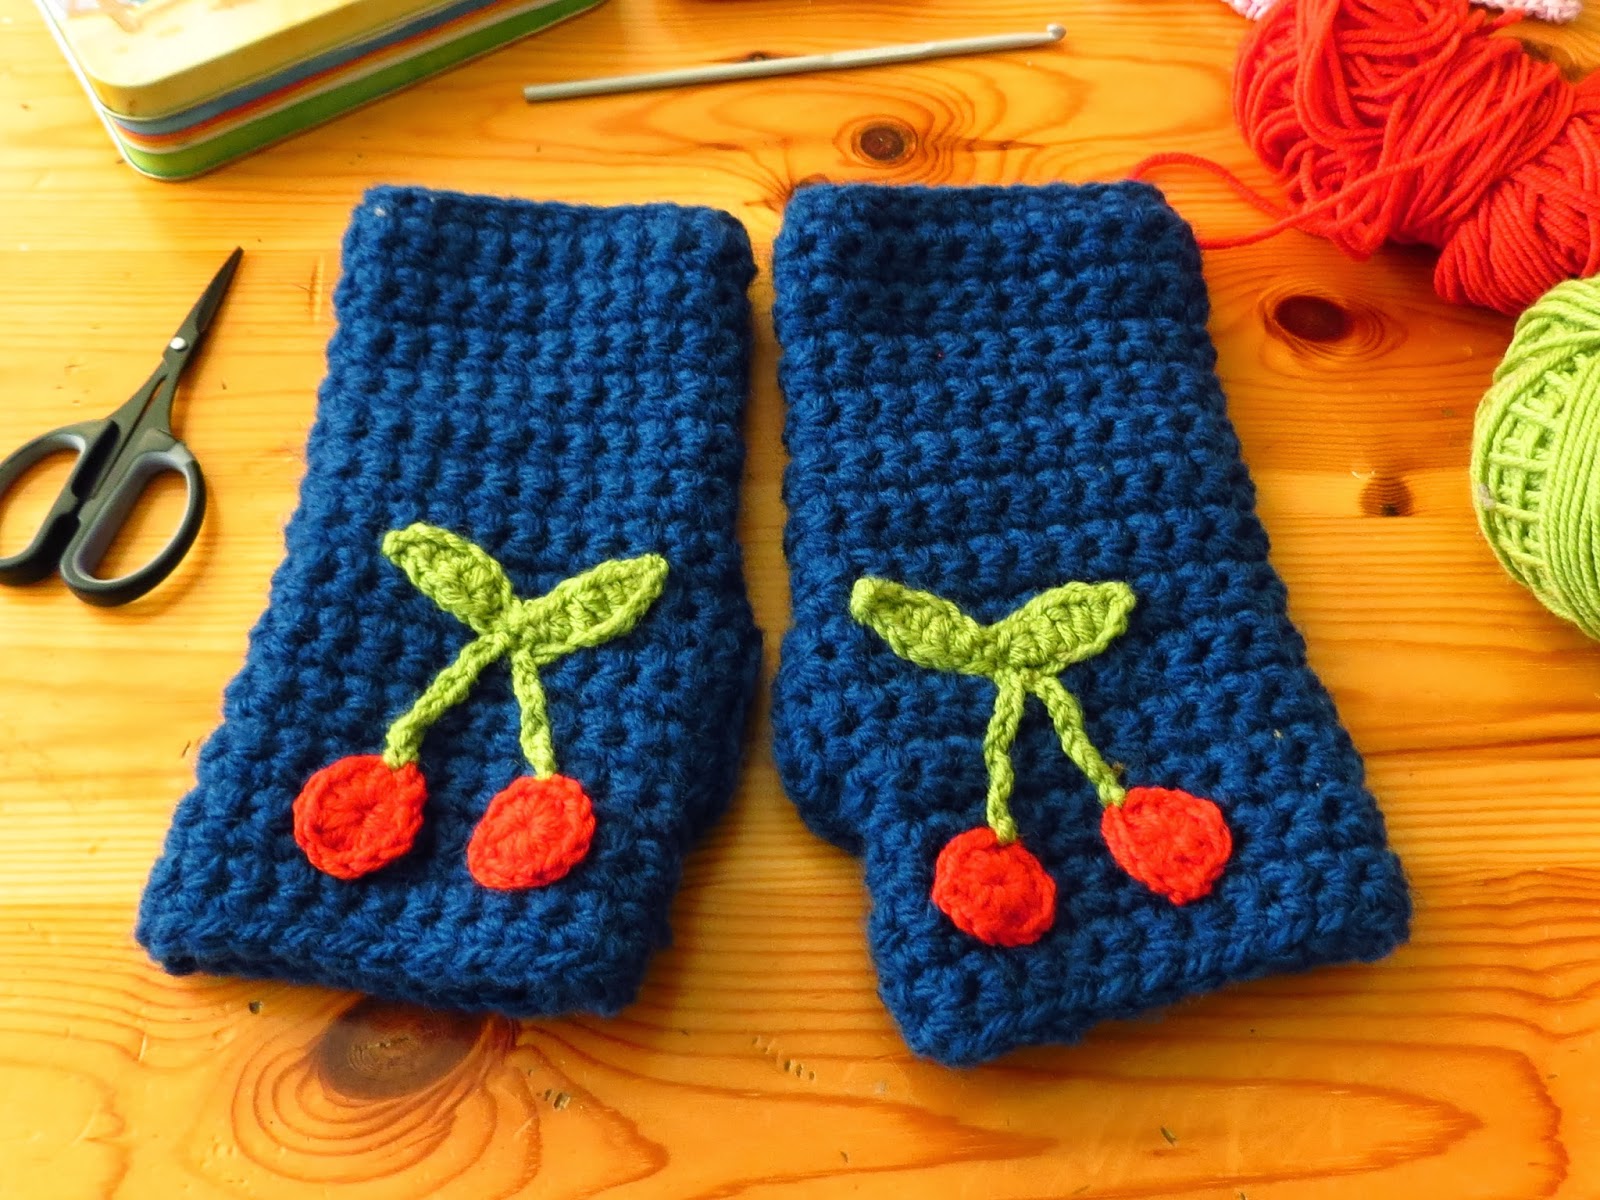
I also tried a different embellishment and I'm thrilled how these cute Cherry wrist warmers turned out :0)

This tutorial includes lots of step by step pictures on how to make the wrist warmers, and obviously you could leave them plain if you preferred. But after the instructions for the wrist warmers there are also detailed instructions on how to make both types of embellishments :0)
Right, shall we talk yarn to begin with ?
This is the brand I used.... Jarrol "Sweet Briar Chunky" . I picked it up in my local yarn shop and found it great to work with. I was keen use chunky yarn and have some wool content for warmth, so this acrylic/wool mix seemed ideal. It was only £2.95 for a 100g ball, and one ball made a pair of wrist warmers with plenty to spare........

Whichever yarn you use, do take a look at the ball band for the recommended hook size. This pattern is based on using Chunky yarn that advises a 6mm hook......here only needle size is illustrated but that is generally the same as hook size anyway........

As in my previous tutorials I'm using U.S. crochet terms as I just find they are more familiar to me these days. I'm sorry if it's confusing at all. There is an excellent conversion chart HERE
My starting chain was 24 stitches and it measured 7 inches or 19cm....which was long enough to go round the widest part of my hand with a little stretch.

You are going to be making a rectangle of crochet using U.S. Single ( U.K double ) crochet. The first row is worked into the foundation chain and then rows progress by working across the previous row, tuning your work at the end of each completed row.
One you have made a chain of the desired length insert you hook into the second chain from the hook, where I've placed my needle to show you...........

Yarn over and pull through ( 2 loops on hook ) yarn over and pull through both loops , first stitch made........

Continue along the initial chain making 1 stitch into each chain across........

This first row is a bit fiddly but it does get easier after this. When you get to the other end your work should look like this.........

Next chain 1 and turn your work, you are ready to start on row two. In this next image I'm trying to make it clear where your hook needs to go. It's very close to the edge of the crochet . See where my needle is, that's where to make your first stitch.............

Here's another view of the correct place, it's under two threads of the previous row.........

Work across this row making one stitch into each stitch of row one .
This next picture shows how easy it is to miss the final stitch at this stage. Counting will help. My initial chain has 24 stitches which means my work is made of row of 23 stitches. In this picture I've made 22 stitches..........

You may need to tease out your yarn a little to find the place to put your final stitch......it's where I've popped my needle in this photo............
Here I'm making the final stitch of row two...........

Chain 1 and turn your work.
Here I've marked the place your first stitch of row three needs to go...........

see how quickly it grows :0)

Chain 1 and turn , here I'm about to start row 4.........

Then it's simply a case of crocheting back and forth in the same way. I love the texture the chunky yarn creates.......

Mine are 28 rows deep...........Once you have completed one make a second the same size...........

I don't know why my work curled up at opposite corners like this but it's not a problem.
Next, if you want to add an embellishment, its time to make two.
These are the instructions for my Granny Flower (scroll down if you are making the cherries)
I made these using some Stylecraft Special Double knitting yarn as I have lots of colours to choose from in my stash. I also chose to use a 3.5mm hook as I wanted my embellishments to come out as small as possible.
Remember I'm using U.S. crochet terms.
Chain 4 and slip stitch to form a ring.
Round 1 chain 2 and work 12 half double crochet (hdc) into ring.
N.B. when I'm making a circle in this way I always crochet over the tail of yarn as I go
Here I've made all 12 hdc stitches and you can see the tail of yarn included in this first round....

Next slip stitch into the 2nd chain and fasten off as I'm doing here.............

Here's my first round complete, with a hole in the middle...........

Next I pull on the tail of yarn to close up the hole. I always do this with the centre of Granny squares too.....it's just how I like them to look.............

Round 2
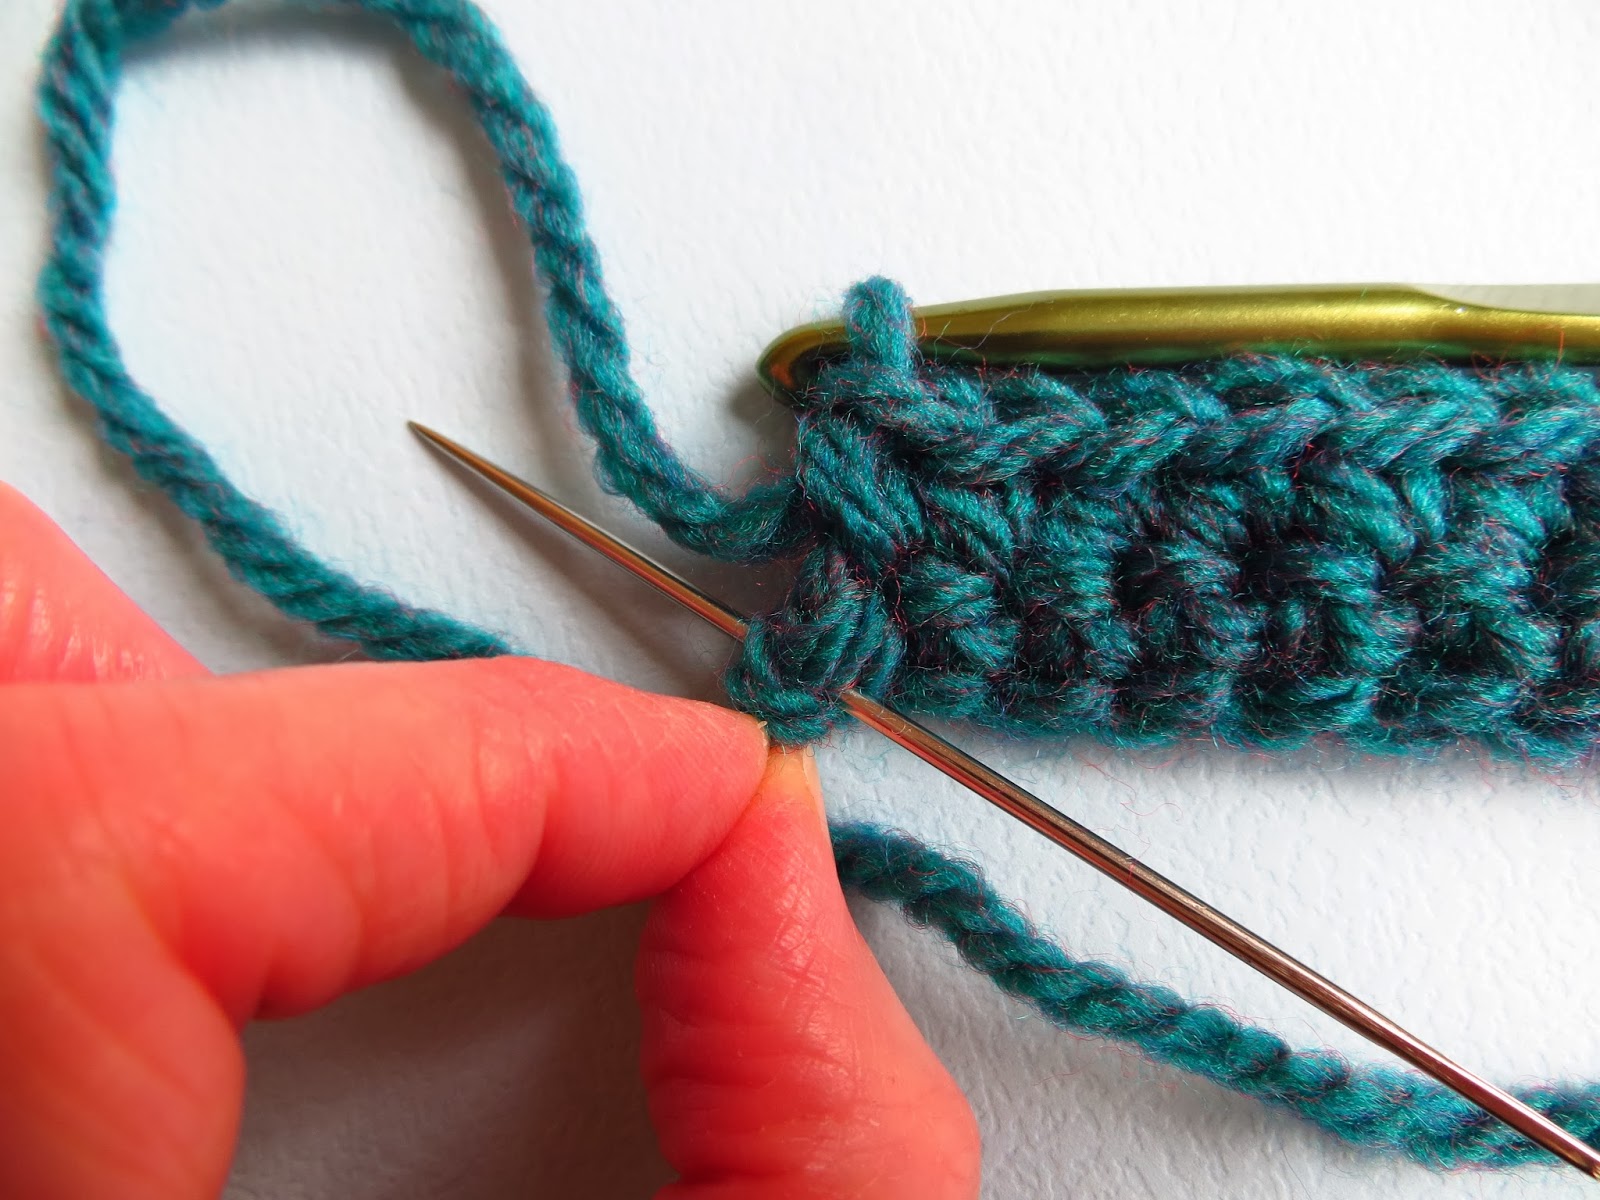
Choose a new colour and slip stitch into a stitch of round 1, just to the left of the join, chain 2.......

make one hdc into the same stitch (counts as 2 hdc ) and then make 2 hdc stitches into each stitch of round one around.
Here I've made 10 stitches and you can see that I'm once again crocheting over the tail end of yarn..........

Here I have just two more stitches to make . It's in the part of round one where I fastened off so it's not always 100% clear where to insert your hook. Just count your stitches so you know how many more stitches need to fit in this space and then use your best judgement as to where they should go......

This is why I always join to the left of a join in the previous round.
Here I've made all 24 stitches and I am fastening off............

Round 3
Placing your stitches in this round is easier as you are working between the clusters of two stitches in round 2.............

Slip stitch join a new colour and chain 2 work 2 hdc into the same space ( counts as 3 hdc). Then make 3 hdc stitches into the next space and subsequent spaces around........

Fasten off by slip stitching through the second chain as usual.
The final round makes the petals so it's a little more tricky but not so bad.
Round 4
Slip stitch join a new yarn colour into any space of round 3, and chain 1........

Into the same space make 1 hdc, 1 double crochet (dc) , 1 hdc, 1 single crochet (sc) and chain 1.
Into the next and subsequent spaces work 1sc, 1hdc ,1 dc, 1 hdc, 1 sc, and chain 1.
Here I've just completed my second petal..........

And here I'm slip stitching into the initial chain 1 to fasten off.........

Scroll down to after the cherries to see more about final construction.
Here are the instructions for my Crochet Cherries as before, these are written in U.S. crochet terms
for these I used double knitting weight yarn and a 3.5mm hook as I wanted them to work up small and solid looking.
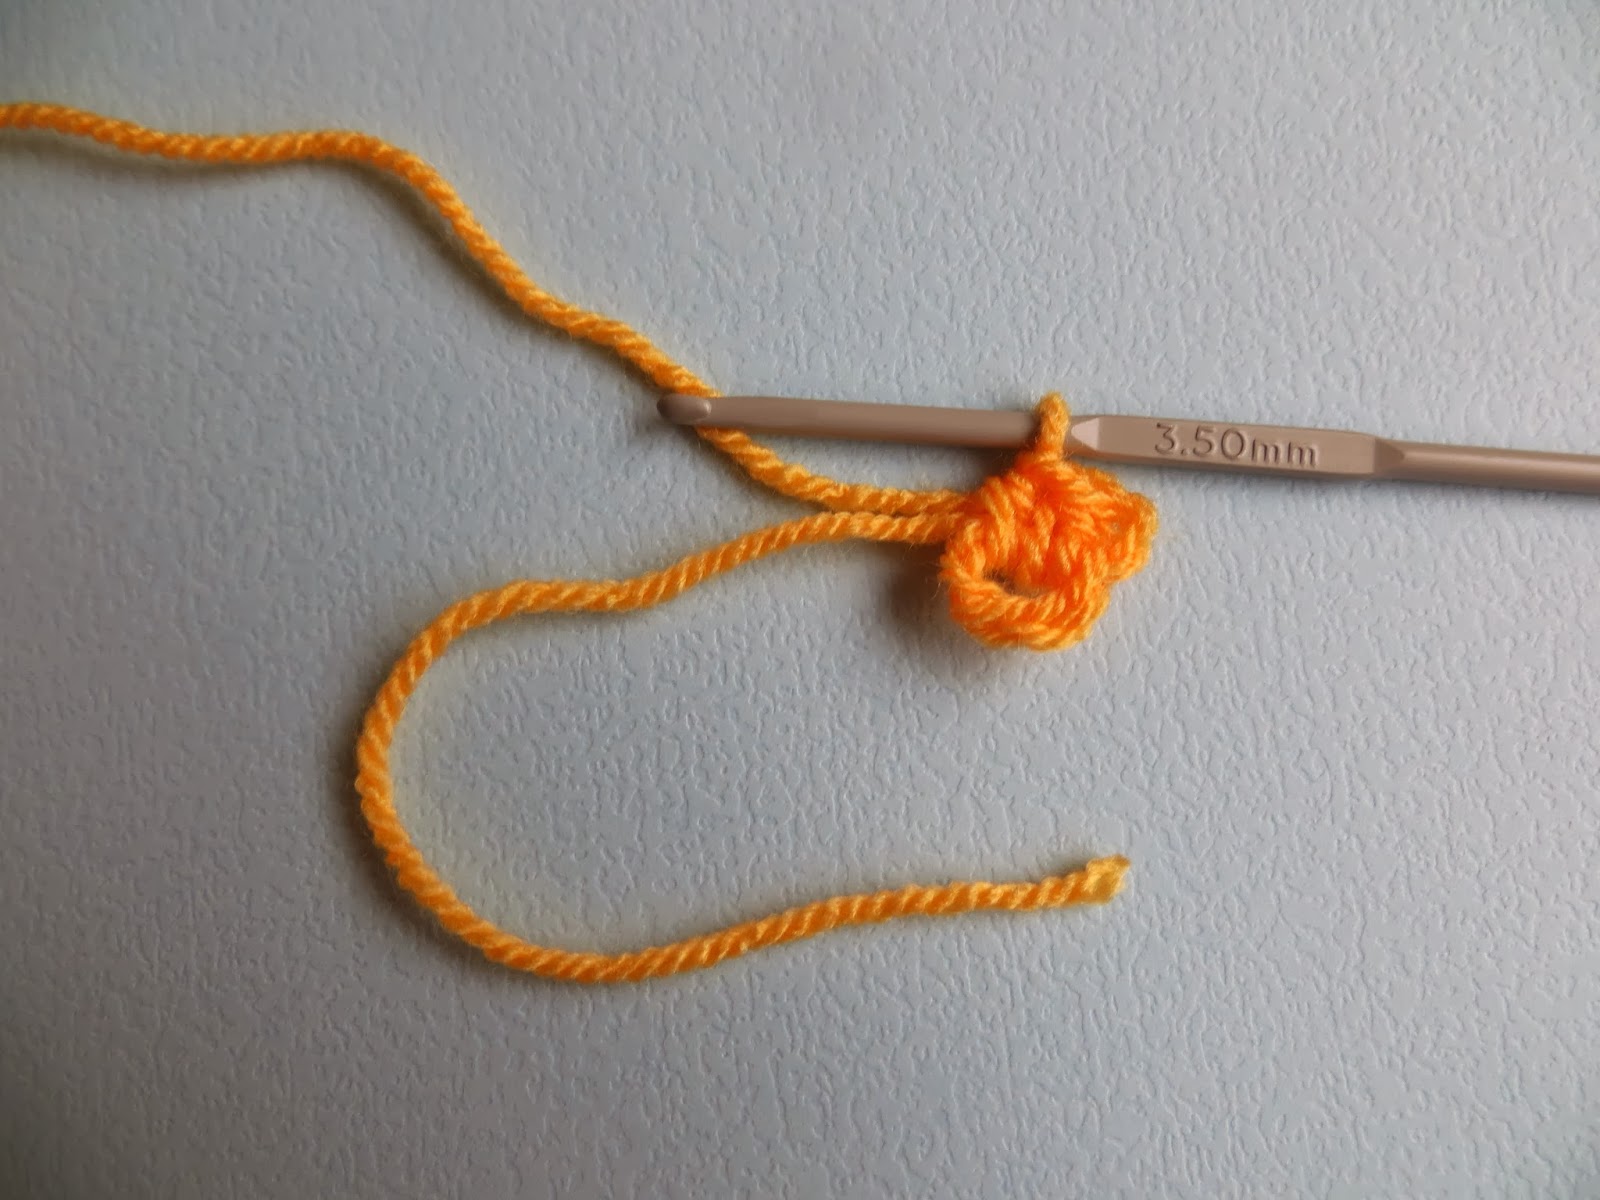
First make two cherries, these are made in exactly the same as the first round of the Granny Flower above. So follow those instructions until you have two circles like this...........

weave in the centre tail and leave the outer tails long, as they can be used to sew the cherries to your wrist warmer later.
These are constructed as one piece of crochet, beginning with the first leaf.
Leaving a long tail of yarn ( about 15 inches) at the start of your work, chain 8 .
Next you are going to work back along this chain and by making stitches of various heights you will create the first leaf.
So, inset you hook into the second chain from your hook as I'm indicating with my needle here.........

And make 1 single crochet.........

In the next stitch make one half double crochet ( hdc) , and in the next stitch 1 double crochet.
then you reach the widest part of your leaf and make a half treble crochet.
I'll go through the steps of this stitch in case you are not familiar with it.
Yarn over twice, as shown here.........

insert hook into next chain...........

Yarn over and pull through (4 loops on hook) .......

Yarn over and pull through 2 hoops (3 loops on hook) ............

yarn over and pull through all three loops.....one half treble crochet made..........

then your stitches gradually decrease in height.
So, in the next chain make 1dc, followed by 1 hdc, and finally 1 sc

To finish of your first leaf slip stitch into the initial chain .......

Yay, one lovely leaf made :0) do not fasten off

Next you chain 8 and make a second leaf in exactly the same way as the first.......

Here is the second leaf made..........

Then slip stitch into the base of leaf one

and chain eight to make a stalk. pick up a cherry and insert your hook, from back to front, into any stitch......

slip stitch and pull up a loop to fasten off...again leave a long tail as you can use this to sew on your cherries

to make the second stem inset your hook into the base of leaf one

and pull through a loop of your initial tail of yarn

use this to then chain 8 and attach your second cherry.........

As you can see in this photo my initial starting chain was not really long enough...ooops.
Final Construction
I'm afraid I haven't done detailed photos of this stage but it's really easy. You are simply going to create a tube of crochet by sewing together the side seams of your rectangle, but first you need to add your embellishments if you are using them. So..........
1. wrap your rectangle of crochet around your wrist, so that the open side in nearest your thumb. You could pin the seam if you like
2. Choose where you want your embellishments to go and attach them securely using the tail ends of yarn you left attached for this purpose.
3. turn your wrist warmer the other way out ( so your embellishments are on the inside ) and begin to close the side seam with some of the same yarn that you used to make them.
4. when you reach where your thumb needs to stick out simply fasten off and start again on the other side of the gap.
5 turn your wrist warmer the right side out again and admire :0)
6. To neaten the thumb holes I added a round of single crochet to mine. Just make your stitches in regular places around the edge. It made a snugger fit and reduces the chance of the hole becoming too baggy.........

Oh I do hope you enjoy making these lovelies .........
Mine are certainly getting a lot of wear at the moment and they always make me smile.
Do let me know if you spot any mistakes in this tutorial .
And if anything is not clear I'll try and help.
Enjoy
Jacquie x
thank you!!!!!!!
ReplyDeletehappy valentine's day Jacquie!!!!!
xxxxxxxx Ale
That's brilliant, as a novice crocheter, I think even I could have go at these. Thank you for sharing. Sarah xo
ReplyDeleteWhat wonderful wrist warmers with their embellishments! Thank you for the well-explained tutorial. I always understand yours so well! That yarn looks so lovely and warm!
ReplyDeleteHappy Valentine's Day!
Thanks so much for taking the time to show us how to make these...more of your patterns I want to try, Jacquie. Also, I really appreciated seeing the Snow Drop flowers you showed in your last post. I have never had any growing near me, but a dear friend brought me a tiny vase full of them after my husband died four years ago, and Snow Drops have been especially precious to me since. Teresa Kasner@blogspot.com published a post about the Snow Drops growing on her farm today with some lovely photos of them you might enjoy. Happy Valentine's Day :) xx
ReplyDeleteThank you so much for this pattern! I have just started crochet and am looking for a first project :) When you say these were a bit big would you recommend decreasing the number of stitches? I love the cherry embellishments!
ReplyDeleteHi Ellie,
DeleteThanks for your comment,
the instructions I gave are for the smaller second pair I made.
Jacquie x
What a great tutorial thank you for sharing. I'm a fairly newbie crocheted and think this is a great project for a beginner. I'm a new follower of your blog too
ReplyDeleteJackie x
Hello.
ReplyDeleteBeautiful.
bye bye
Your craft are beautiful very very talented :)
ReplyDeleteI have a question: What county do you live?
Regards from Poland
These are gorgeous! I've got a child free weekend so maybe I'll have a go at making them! Xx
ReplyDeleteLove these wristies, Jacquie! and the embellishments are gorgeous - thank you for the detailed instructions, I know how time consuming they are to do. You are so kind!
ReplyDeleteJones x
Wow Jacquie you did a great job!! They are soooo cool ♥♥ It will be a keeper for sure. I am already thinking of Christmas 2014.
ReplyDeleteHave a JOYful Valentine's day!!
Thank you so much they are lovely. Happy Valentine's Day.
ReplyDeleteMeredith
Gorgeous pattern, I can't decide which I like better, the flowers or the cherries, so I guess I'll have to make two pairs! A wonderful tutorial, thank you! Chrissie x
ReplyDeleteI am in LOVE with those cherries. Absolutely LOVE them. Thank you for sharing your pattern Jacquie, especially with pictures xx
ReplyDeletePerfection Jacquie! Love those cherries xox
ReplyDeleteJolie:-)
ReplyDeleteSO wonderful!
ReplyDeleteThanks
Brigitte
Both wrist warmers, and the decorations are beautiful Jacquie and thank you for the tutorials, so clear and easy to understand! Hope that you love wearing your warmers!! xx
ReplyDeleteOh, these are so pretty. I hope that I can do them. I struggle with crochet...self taught and a lefty at that. Thank you so much. I am determined, altho. they will never be as lovely as yours are..
ReplyDeleteMay your weekend be lovely and filled with joy.
I love your tutorials. i have to make those beauties.
ReplyDeletethanks
I have some friends who are new to crochet and would love to make these - really simple with clear pictures. Thanks Jacquie - this must have taken a lot of time x Jane
ReplyDeleteJacquie you are just wonderful - after attending Lucy's workshop last week I am all fired up with crochet once again and you have delivered such a perfect pattern, thank you so much. You have made such a wonderful job of yours and I cannot wait to start - big cheers for Jacquie. Sorry not been commenting as much but had such a busy week. Always enjoy your blog Jacquie, have a wonderful weekend, big hugs and loves, keep warm and cosy.
ReplyDeleteDorothy
:-)xxxxxxxxxxxxxxxxxxxxx
I really like the look of your wrist warmers, super cosy - and the cherries are just adorable. Your tutorial is fabulous, thank you for sharing.
ReplyDeleteThese are gorgeous! I especially love the cherry ones. Thank you for sharing your tutorial.
ReplyDeleteMarianne x
Oooo, there is a wool called Sweet Briar?!! I am going to have to get that one! Thanks for the tutorial, I will be trying this out over the coming days. Keep safe and warm xx
ReplyDeleteI'm loving the red cherries against the dark background!
ReplyDeleteWhat a fab tutorial- these look like a quick and easy make (my kind of project!!)
ReplyDeleteI think I like the cherries best, too.
Have a super week,
Sarah x
Thank you for this wonderful tutorial. I am off to buy some wool tomorrow and try to make one this week! I haven't picked up a crochet hook since school days! Thank you for your comment I was just about to pop over to you when I saw it. Your crochet snowdrops are so lovely too.
ReplyDeleteSarah x
They are so lovely Jacquie, and thanks so much for the great detailed tutorial, you've done a wonderful job once again! Your snowdrops are also very cute - such a delicate but sturdy little flower and one I love! Hugs, Joy x
ReplyDeleteI don't know knitting:(
ReplyDeleteBut you explain it very detailed:))
Hello, today I found your blog on they internet! And Wow I love all this! What a nice patterns!
ReplyDeleteI also start follow you!
Have a Nice Evening!
Regards! Joelle
http://hipmetkleur.blogspot.nl
Great tutorial! I LOVE that yarn! It is such a pretty color!
ReplyDeleteOh I love cherries! They're so cute :)
ReplyDeleteLucy x
Merci pour votre aide je suis novice et je comprends en francais merci beaucoup
ReplyDelete