Thursday 30 June 2011

June Nature Notes

Hello Lovelies,
It's that time again ....time for me to share some of the lovely illustrations from Edith Holden's " Nature Notes of an Edwardian lady" the sister book to her Hugely popular "Country Diary".
This is the sixth monthly post I've written and I can't believe we are half way through the year already .
June , the start of summer and a time of really long days, and now ,so quickly, it is almost over ....sigh.

Here is the folk law for this month....


Edith's illustrations are so lovely and once again reassuringly familiar 106 years later........


I think the wild roses have been particularly beautiful this year.....but maybe it's just that I'm noticing them properly for the first time......


I have already shared some of my own photos of the countryside in these parts in this post. Here are some more ...there has certainly been plenty of beauty to capture...and I do enjoy being outside looking for likely subjects :0)

Hay ( or possibly silage ) making.....


Tall grasses gently waving in the breeze on a hot day.....


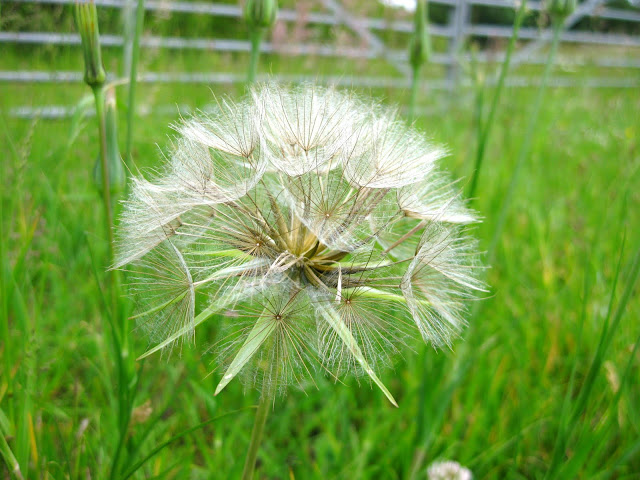
The seed head of Goats Beard ...similar to a dandelion clock but more robust.....


Clover...every where and so easy to overlook but gorgeous in Macro :0)....


Thistle flowers...such a pretty flower on such a painful plant !....


I've included this picture because I love the fuzzy background of the road stretching into the distance and the steely blue sky.....


More clover this time in pink.....


Duckings, already almost as big as their Mum...


Rosebay Willow Herb...I've always loved this wild flower .We used to gather it as a treat for our goats when I was little ....this was snapped in the car park at work :0)........


The perfect Wild  Rose......


And finally ( I know this is a rather long post ! )..... taken today....more Poppies .......Looking wonderful with clover and ? fever few ( correct me if you know better )......


A wonderful vista ...Standing ,drinking in this view ( waiting for the sun to return ) made me think if this poem


Hope you are making the most of Summer ( or happy that the days will soon be longer, if you are on the opposite side of the world )
Jacquie x

Tuesday 28 June 2011

Country Living ...then and now

Hello Lovelies,
A while ago my Mum dropped into conversation that she had a copy of the first Country Living Magazine . This surprised me somewhat as she has moved house twice since it was first published.
A few weeks later she brought the Magazine for me to look at..........


It's not clear on this picture but the date is summer 1985. It must have been a quarterly publication at first .
Want to see inside ? Please excuse the quality of these pics . My little camera does not like photographing print.
This is a nice article about a period home ...look at all those dried flowers !........


Other rooms are lovely and look timeless........


I'm loving that patchwork quilt

The fashion is "interesting".I don't remember wearing anything like this...thankfully :0).........


Some adverts still look OK.....


Others, not so OK.......

It says "When your dinner party can cost as much as your cooker ,then your cooker had better be AEG"....yikes , such Eighties excess .

You could join the National trust ...a family membership was £25 ( just checked today's price is £ 63 ...seems like it's cheaper now to me )...........


And there was an article about the joys of shopping by post........


Well this was pre internet . As you can see, there's not a www. in sight :0)......


All in all it was interesting to see this first edition but it was dissapointing compared with the 2011 version.Todays CL is so much more colourful and interesting.
Here are a few of the lovely images from Julys edition........


CL has certainly come along way since the first edition , June and July's Magazines have been particularly gorgeous. Let's hope it continues to go from strength to strength :0)
Jacquie x

Sunday 26 June 2011

Granny Square Blanket Ta Dah !!!!!!!!


Hello Lovelies ,
Well ,on the scorching day that we have had today I finally finished my Granny Square blanket. Those little squares have been at the top of this blog for ages now ( and I'm not planning on changing them yet ) ...indeed I started making them back in January inspired by a vintage blanket owned by my Mum...you can read all about that blanket here .
So , how did my version turn out ? Want to see ?

Then do come out side into the heat of the garden with me , here it is ........


Looking lovely draped over a chair .......


and here is the whole blanket.......


Do you like ? I must say I LOVE it :0)   I could look at this picture for AGES.
Yes I'm very happy with this little blanket. It's 36 inches by 50 inches.A great size for putting over your legs or draping over the back of a chair. My first completed blanket of 2011. Yay !!

Something else I'm loving is my new , old basket . I spied this beauty in a charity shop the other week . I had to have it as it's exactly the same as one I had for school cookery ( home economics ) lessons as a teenager......


And inside is.........


The vintage inspiration blanket :0)  Here they are together.........


Here you can see just how tiny the squares of the original blanket are .Isn't it stunning ...I think the amount of work that must have gone into this is mind boggling.

I'm very happy that the plum colour is so similar to the original.Something that differs is the border.Mine is a wide, colourful affair , of course influenced by the stunning creations of you know who :0) ...


It is made of seven of my favourite colours from the squares then a row of single crochet ( U.K. double ) followed by the same simple edging I made up for my granny stripe. That's simply  sc , sc , then (sc ,chain 3 ,sc) all in the same stitch ,repeat around.
Here are a couple more indoor shots ....just because ......


Thank you all so much for sharing this project with me ,I can't tell you how much it adds to the enjoyment I get from the creative process . Lets face it , crochet blankets are not that interesting to husbands and sons ( though the latter do make kind comments on occasion).Yes , being able to share all this with like minded souls is wonderfully encouraging...so thank you for reading and especially for all the lovely comments you so generously leave me :0) You are the best !

Hope you are coping with this heat if you are in the U.K. My computer is telling me it's warmer here than in Greece at the moment !
Jacquie x

P.S. thanks also to those who highlighted my method for getting a flat border is similar to this great tutorial. Do have a look :0)

Wednesday 22 June 2011

How to make a flat border for granny square blankets


Hello Lovelies,
As you can see from the picture above I'm on the border of my granny square blanket. A row of plum then four colours so far , think I'll add two or three more then a plum edge. I love working the border .It's so fast ...zooming along with no fiddeliness.Yes it's a favourite part of mine .
Edging groups of granny squares can have pitfalls and I thought you may like to see my method for avoiding a wavy edge. It's a common problem and very frustrating if your lovely blanket ends up going wrong at the final stage . Here is an example of just such a wavy edge on a very stunning blanket.

The trouble begins when you put three double ( U.K. treble ) crochet in each corner of your granny square.It would be fine for a narrow border but if you are planning to make a wide border it will not lie flat and end up all frilly.
I'm talking about the small spaces created by the chain 2 in the corner of the individual squares. ....


The way I get around this is to treat the two corner spaces as one. In this blanket I've made 1 D.C. (U.S.) in the first space ...


Then I've bridged the gap with a D.C. decrease stitch. Like this ....

Yarn over, insert hook into first space , yarn over ,pull through space ( 3 loops on hook)  then yarn over ,pull though 2 loops(2 loops on hook).....


Yarn over, Insert hook through second space, yarn over ant pull through (4 loops on hook)........


Yarn over , pull through 2 loops ( 3 loops on hook)......


Yarn over , pull through all 3 loops( decrease stitch made).............


Then I've finished the bridging cluster with a final D.C. in the second space ...

Admittedly it looks a bit messy at this stage and I would recommend using a inconspicuous colour. As the border grows it blends in nicely and results in a lovely flat border :0)


Hope this is helpful to some of you lovelies. As always, please let me know if anything is unclear .
Jacquie x